
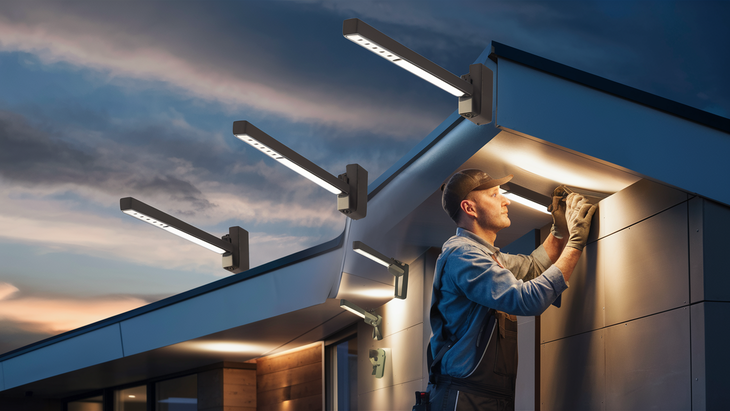
Motion sensor lights are a fantastic way to improve the security and convenience of your home. They automatically turn on when they detect movement, which can deter intruders and provide illumination when you need it most. Installing motion sensor lights is a straightforward process that you can accomplish with some basic tools and a little know-how. This step-by-step guide will walk you through the installation process.
Tools and Materials Needed:
- Motion sensor light fixture
- Screwdriver (Phillips and flathead)
- Drill and drill bits
- Wire stripper/cutter
- Electrical tape
- Voltage tester
- Ladder
- Safety glasses
- Work gloves
Step 1: Choose the Right Location
Selecting the optimal location for your motion sensor lights is crucial for their effectiveness. Consider the following factors:
- Coverage Area: Ensure the sensor covers the desired area, such as driveways, walkways, or entrances.
- Height: Install the light at a height of 6-10 feet for the best detection range.
- Obstructions: Avoid placing the sensor near trees, shrubs, or other objects that could cause false triggers.
Step 2: Turn Off the Power
Safety first! Before you begin any electrical work, turn off the power to the area where you will be installing the light. Locate the appropriate circuit breaker in your electrical panel and switch it off. Use a voltage tester to confirm that the power is off by testing the wires in the existing light fixture.
Step 3: Remove the Existing Light Fixture
If you are replacing an existing light fixture with a motion sensor light, follow these steps:
- Remove the Bulbs: Take out any light bulbs from the fixture.
- Unscrew the Fixture: Use a screwdriver to remove the screws holding the fixture to the wall or ceiling.
- Disconnect the Wires: Carefully disconnect the wires connecting the fixture to the electrical box. Note the wiring configuration for reference.
Step 4: Install the Mounting Bracket
Most motion sensor lights come with a mounting bracket. Install this bracket to the electrical box using the provided screws. Make sure the bracket is secure and level.
Step 5: Connect the Wires
Now it's time to connect the wires from the motion sensor light to the wires in the electrical box:
- Match the Wires: Typically, you will connect the black (hot) wire from the light to the black wire in the box, the white (neutral) wire from the light to the white wire in the box, and the green or bare copper wire (ground) from the light to the ground wire in the box.
- Secure the Connections: Twist the corresponding wires together and secure them with wire nuts. Wrap electrical tape around the wire nuts for extra safety.
Step 6: Attach the Light Fixture
Once the wires are connected, carefully tuck them into the electrical box. Attach the light fixture to the mounting bracket using the provided screws. Make sure the fixture is securely in place.
Step 7: Adjust the Sensor Settings
Most motion sensor lights allow you to adjust the sensitivity, duration, and range of the sensor. Refer to the manufacturer’s instructions to set these parameters according to your preferences. Typically, you can adjust the:
- Sensitivity: Determines how much movement is needed to trigger the light.
- Duration: Sets how long the light stays on after being triggered.
- Range: Adjusts the distance at which the sensor detects motion.
Step 8: Turn On the Power
Return to your electrical panel and turn the circuit breaker back on. Test the motion sensor light to ensure it is working correctly. Walk in front of the sensor to verify that it detects motion and turns on the light.
Step 9: Final Adjustments
Make any final adjustments to the sensor settings as needed. If the light is not activating correctly, try increasing the sensitivity or adjusting the angle of the sensor. Ensure that the light covers the desired area without being triggered by false alarms.
Tips for Optimal Performance
- Regular Maintenance: Keep the sensor clean and free of debris to ensure accurate detection.
- Weather Considerations: Make sure the fixture is weatherproof if it is installed outdoors.
- Energy Efficiency: Use LED bulbs for better energy efficiency and longer lifespan.
Conclusion
Installing motion sensor lights is an effective way to enhance your home’s security and convenience. By following this step-by-step guide, you can confidently install your motion sensor lights and enjoy the benefits of automatic illumination. Remember to always prioritize safety when working with electrical components and consult a professional if you encounter any difficulties.
Protect what matters most. Dial +1 888-805-5456 for the best home security solutions.

