Having a video doorbell can help you improve the security of your house and give you greater confidence at the same time. From the smartphone and even when the homeowner is away, video doorbells let the user check and interact with people at the door. Reolink makes PoE video doorbell cameras with decent video quality, smart alerts, intercom, and easy setup. Reolink PoE video doorbells will be perfect if you are looking for a wired doorbell camera free of regular battery changes. We will walk you through the one-step production procedure in this tutorial.
What You'll Need?
Before installing your Reolink PoE video doorbell camera, make sure you have all the necessary components:
- Reolink PoE Video Doorbell Camera:
- Ethernet Cable You will need an outdoor Cat5e or Cat6 Ethernet cable to connect your doorbell to the PoE NVR or PoE switch depending on the length between the doorbell and the location of the PoE NVR or PoE switch.
- NVR or POE Switch - You need a PoE NVR or a PoE Switch to power your doorbell camera through ethernet cables.
- WiFi Connection This means your camera will connect to your wifi network so you can view video on your smartphone.
- Reolink App Download the free Reolink app for iOS or Android to finish the setup and use your camera.
- Power Drill
- Screwdrivers
- Optional: An Outdoor Junction Box if there is no doorbell box to house the wiring connections.
Select Camera Location
When choosing where to install your video doorbell, consider the following:
- It should be mounted at a height of approximately four to five feet with a tilt slightly downwards towards the visitors.
- It should be mounted near an existing exterior light, preferably near the entrance of your home.
- When installing, ensure the depth of the location being worked on is at least three inches to accommodate wiring to be fitted into the wall or junction box.
- Ensure that the place you have chosen has a good signal by using your smartphone to test it.
The camera is weatherproof but do not put the camera where water can accumulate or fall directly on the lens. Also, ensure that the doorbell chime is audible from the new location in case of repositioning your existing wired doorbell.
Run Ethernet Cable
Visualize the path through which the Ethernet cables will run from the installation location of the camera to the PoE NVR or switch in your house. It is also possible to direct the wiring through the existing voids, chases, or other concealed pathways so that the outside of your house remains clean. If you do not have a channel then you might require creating a few holes to run the cable from outside to inside.
Always ensure that you splice much more cable to the ends it is easier to manage the excess cable at the end of installation than to realize you are short of the required length. Seal all outside crevices with caulking material to prevent seepage of water and intruders.
When pulling the cable up to the PoE NVR or switch, ensure that you pull more than what you intend to terminate so that you can have easy access to the connectors. If the Ethernet cable is not connectorized then one should have to make some effort to connectorize both ends, using an RJ45 connector. Check cable continuity with a cable tester or multimeter if available in the vicinity.
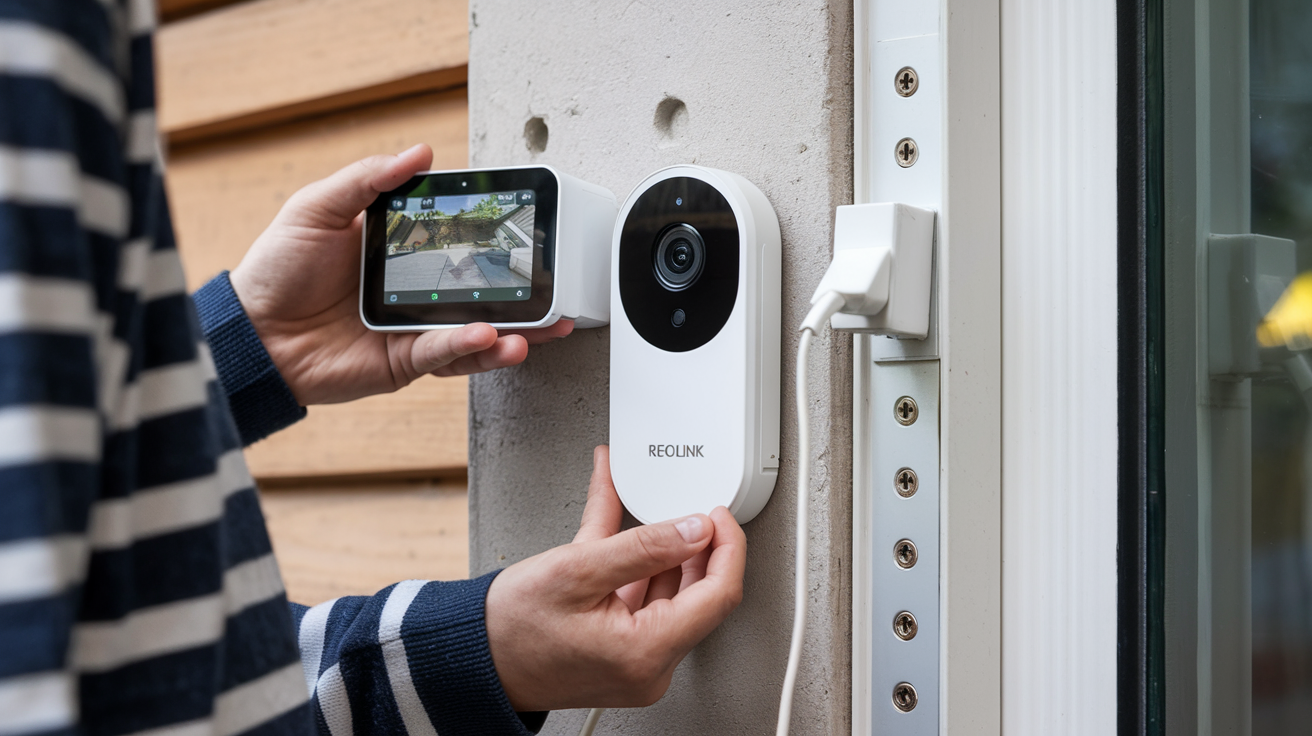
Connect Doorbell Camera
Cabling is done appropriately by pulling the Ethernet cable, the next step involves mounting and connecting the video doorbell. First, pass the cable through the wall cutout or junction box so that it is in an easily reachable position for the camera. It is advised to attach the Reolink camera using screws or anchors depending on the instructions provided with the Reolink camera package. Ensure that it is correctly oriented, positioned horizontally, and well fixed before continuing.
After placing the camera securely, take the Ethernet cable you prepared and plug it into the RJ45 that is located behind the doorbell. If your model has a pigtail connector, it can be used to make the connection for the wall line and camera input. The wiring should be neatly tucked inside the junction box and an extra outdoor-rated connection box should be installed while leaving the connector ends exposed. This indicates that the camera must be secured to finish mechanical installation before going indoors.
Connect NVR and Configure the System
Go back to your PoE NVR or the PoE switch location inside. Place the other end of the Ethernet run at any convenient PoE port on your NVR or switch. Check whether the NVR or switch is connected to the local network via Ethernet if not already; ensure that it is connected to a power source.
More often than not, the Reolink app will be able to detect cameras on your local network without requiring additional configuration. 3. Open the app create device users and enable push notifications to receive mobile alerts. For the network settings, refer to the manual of your Reolink NVR or doorbell when needed. Some of the parameters, which can be configured to the camera behavior are the video quality, motion zones, and time schedules.
At the end of the power-on sequence, an application will request you to do the last updates of firmware, synchronization, and tuning of alarms. It is a complete Reolink PoE Video Doorbell Camera System that you will find easy video intercom access, high-quality image, and smart alerting services for better visibility at the exterior of your home. Take the chance to have a professionally monitored entry point that will give you the comfort that you have been looking for.
Protect your home today with ADT’s top-rated security solutions!
Call now at +1 877-470-7879 to get a free consultation and find out how you can secure your home with the best in the business. Don’t wait—ensure your peace of mind with ADT!